Adding GPG Signature to GitHub - A Complete Guide
About GPG
Hey there! GPG stands for GNU Privacy Guard, and you might also hear it called PGP. :D
It’s a powerful encryption program that comes bundled with Ubuntu by default - pretty handy, right?
Since GitHub is an open-source platform, anyone can clone and access public repositories. But when you’re working with private repositories or collaborating on sensitive projects, having someone peek at your data is definitely not cool.
That’s why GitHub strongly recommends (and sometimes requires) using GPG signatures when making pull requests. It’s like adding a digital signature to prove that the commit really came from you!
Let me walk you through how to set up GPG signatures step by step. I’ll keep it brief here, but check out the reference links at the bottom for more detailed info.
1. Generating a GPG Key
$ gpg --full-generate-key
gpg (GnuPG) 2.2.4; Copyright (C) 2017 Free Software Foundation, Inc.
This is free software: you are free to change and redistribute it.
There is NO WARRANTY, to the extent permitted by law.

Please select what kind of key you want:
   (1) RSA and RSA (default)
   (2) DSA and Elgamal
   (3) DSA (sign only)
   (4) RSA (sign only)
Your selection?
I went with the RSA encryption method (the default option).
RSA keys may be between 1024 and 4096 bits long.
What keysize do you want? (3072) 4096
Requested keysize is 4096 bits
GitHub requires at least 4096 bits, so let’s go with 4096!
Please specify how long the key should be valid.
         0 = key does not expire
      <n>  = key expires in n days
      <n>w = key expires in n weeks
      <n>m = key expires in n months
      <n>y = key expires in n years
Key is valid for? (0) 0
I was feeling lazy, so I set it to never expire. Just enter 0!
GnuPG needs to construct a user ID to identify your key.

Real name: Jay Lee
Email address: jayleekr0125@gmail.com
Comment: lol
You selected this USER-ID:
    "Jay Lee (lol) <jayleekr0125@gmail.com>"

Change (N)ame, (C)omment, (E)mail or (O)kay/(Q)uit? O
We need to generate a lot of random bytes. It is a good idea to perform
some other action (type on the keyboard, move the mouse, utilize the
disks) during the prime generation; this gives the random number
generator a better chance to gain enough entropy.
We need to generate a lot of random bytes. It is a good idea to perform
some other action (type on the keyboard, move the mouse, utilize the
disks) during the prime generation; this gives the random number
generator a better chance to gain enough entropy.
Fill in your name, email, and other info, then proceed to generate your GPG key.
Oh, and don’t forget your password! 😅
2. Checking Your GPG Key
$ gpg --list-secret-keys --keyid-format LONG
gpg: checking the trustdb
gpg: marginals needed: 3  completes needed: 1  trust model: pgp
gpg: depth: 0  valid:   1  signed:   0  trust: 0-, 0q, 0n, 0m, 0f, 1u
/home/jayleekr/.gnupg/pubring.kbx
---------------------------------
sec   rsa4096/037ED189F6F42EF3 2020-10-08 [SC]
      A95244C509A02D9F0790CFB0037ED189F6F42EF3
uid                 [ultimate] Jay Lee (lol) <jayleekr0125@gmail.com>
ssb   rsa4096/38DDEF7B4E6758A4 2020-10-08 [E]
Here’s my GPG key information! My GPG Key ID is 037ED189F6F42EF3.
The public key encryption file is located at /home/jayleekr/.gnupg/pubring.kbx (I backed this up just like SSH keys, haha).
Now let’s generate the public key using this ID!
3. Generating the Public Key
To generate the public key, use your ID like this:
$ gpg --armor --export 037ED189F6F42EF3
-----BEGIN PGP PUBLIC KEY BLOCK-----
XXXXXXXXXXXXXXXXXXXXXXXXXXXXXXXXXXXXXXXXXXXXXXXXXXXXX
XXXXXXXXXXXXXXXXXXXXXXXXXXXXXXXXXXXXXXXXXXXXXXXXXXXXX
...
...
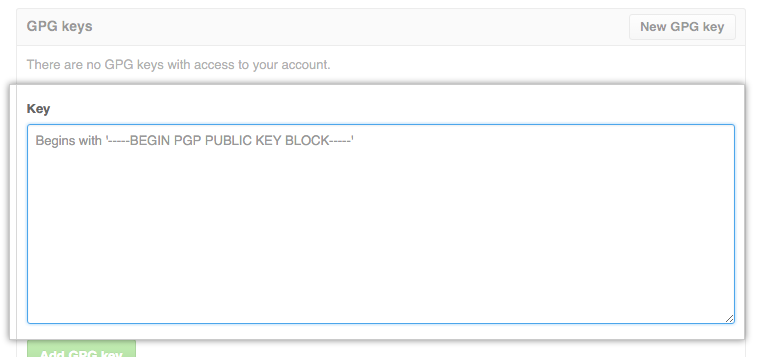
-----END PGP PUBLIC KEY BLOCK-----You’ll get output from BEGIN to END like above. Just copy this entire block to your GitHub personal settings, and you’re done!
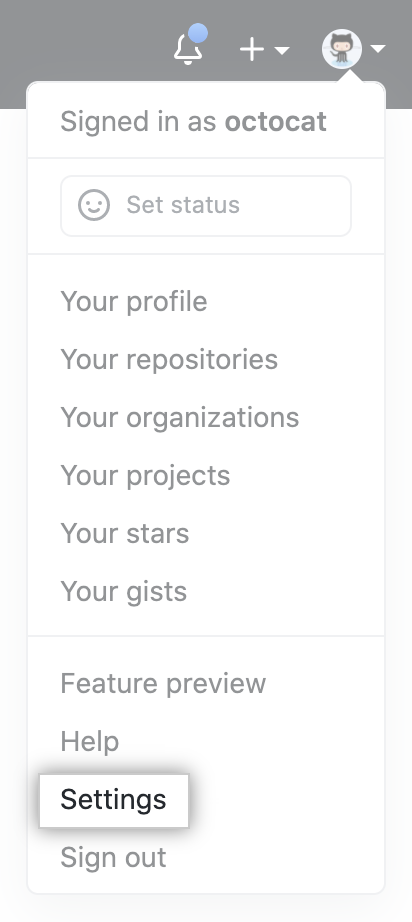
4. Adding the GPG Public Key to GitHub

5. Telling Git About Your GPG Key
We confirmed our GPG ID earlier:
$ gpg --list-secret-keys --keyid-format LONG
gpg: checking the trustdb
gpg: marginals needed: 3  completes needed: 1  trust model: pgp
gpg: depth: 0  valid:   1  signed:   0  trust: 0-, 0q, 0n, 0m, 0f, 1u
/home/jayleekr/.gnupg/pubring.kbx
---------------------------------
sec   rsa4096/037ED189F6F42EF3 2020-10-08 [SC]
      A95244C509A02D9F0790CFB0037ED189F6F42EF3
uid                 [ultimate] Jay Lee (lol) <jayleekr0125@gmail.com>
ssb   rsa4096/38DDEF7B4E6758A4 2020-10-08 [E]
Now let’s tell git about this key:
$ git config --global user.signingkey 037ED189F6F42EF3And let’s tell our terminal (tty) about it too!
$ test -r ~/.bash_profile && echo 'export GPG_TTY=$(tty)' >> ~/.bash_profile
$ echo 'export GPG_TTY=$(tty)' >> ~/.profile
6. Committing with GPG Signature
It’s simple - just add the -S option!
$ git commit -S -m "#IssueNumber"Now enter the password you set when creating the GPG key, and your commit will be complete with a signature!