
About GPG
GPG는 GNU Privacy Gourd 의 약자로 PGP라고 불리기도 합니다. :D
강력한 암호화 프로그램으로서 Ubuntu를 설치할때 기본적으로 포함되는 패키지이도 하죠!
Github는 오픈소스 저장소이기 때문에 누구나 clone을 통하여 데이터에 접근이 가능합니다.
다만 개인저장소와 같은 Private 한 기능도 제공하는데, 이러한 저장소에 Push, Clone, Pull 을 해가며 공동작업을 하는 데이터를 누군가가 옅보는 일은 매우 불쾌한 일이죠.
그래서 Github 에서는 Pull Request시 GPG Signature와 함께 commit 하는 것을 추천합니다. (반강제)
그럼 GPG Signature 를 어떻게 추가하는지 아래에서 간략하게 소개하겠습니다.
자세한 내용은 Reference 에 링크 남겨둘테니 참조해주세요.
1. GPG Key 생성
1
2
3
4
5
6
7
8
9
10
11
$ gpg --full-generate-key
gpg (GnuPG) 2.2.4; Copyright (C) 2017 Free Software Foundation, Inc.
This is free software: you are free to change and redistribute it.
There is NO WARRANTY, to the extent permitted by law.

Please select what kind of key you want:
   (1) RSA and RSA (default)
   (2) DSA and Elgamal
   (3) DSA (sign only)
   (4) RSA (sign only)
Your selection?
저같은 경우에는 RSA 암호방식(default)를 사용했습니다.
1
2
3
RSA keys may be between 1024 and 4096 bits long.
What keysize do you want? (3072) 4096
Requested keysize is 4096 bits
Github에서는 최소 4096 bits를 원합니다. 그래서 4096 ㄱㄱ
1
2
3
4
5
6
7
Please specify how long the key should be valid.
         0 = key does not expire
      <n>  = key expires in n days
      <n>w = key expires in n weeks
      <n>m = key expires in n months
      <n>y = key expires in n years
Key is valid for? (0) 0
마지막으로 귀찮아서 expired 기간은 없앴습니다. 0 ㄱㄱ
1
2
3
4
5
6
7
8
9
10
11
12
13
14
15
16
17
GnuPG needs to construct a user ID to identify your key.

Real name: Jay Lee
Email address: jayleekr0125@gmail.com
Comment: lol
You selected this USER-ID:
    "Jay Lee (lol) <jayleekr0125@gmail.com>"

Change (N)ame, (C)omment, (E)mail or (O)kay/(Q)uit? O
We need to generate a lot of random bytes. It is a good idea to perform
some other action (type on the keyboard, move the mouse, utilize the
disks) during the prime generation; this gives the random number
generator a better chance to gain enough entropy.
We need to generate a lot of random bytes. It is a good idea to perform
some other action (type on the keyboard, move the mouse, utilize the
disks) during the prime generation; this gives the random number
generator a better chance to gain enough entropy.
이름 email 등의 정보를 채워넣고 진행하면 이제 gpg key 가 생성됩니다.
아 참고로 암호는 까먹지 마세요^^;;
2. GPG Key 확인
1
2
3
4
5
6
7
8
9
10
$ gpg --list-secret-keys --keyid-format LONG
gpg: checking the trustdb
gpg: marginals needed: 3  completes needed: 1  trust model: pgp
gpg: depth: 0  valid:   1  signed:   0  trust: 0-, 0q, 0n, 0m, 0f, 1u
/home/jayleekr/.gnupg/pubring.kbx
---------------------------------
sec   rsa4096/037ED189F6F42EF3 2020-10-08 [SC]
      A95244C509A02D9F0790CFB0037ED189F6F42EF3
uid                 [ultimate] Jay Lee (lol) <jayleekr0125@gmail.com>
ssb   rsa4096/38DDEF7B4E6758A4 2020-10-08 [E]
위는 제 GPG Key ID 등의 정보입니다.
제 GPG Key ID 는 037ED189F6F42EF3 가 되는거죠.
그리고 공개키 암호화 파일의 위치는 /home/jayleekr/.gnupg/pubring.kbx 네요. (sshkey 처럼 개인적으로 백업해두었습니다.ㅎㅎ)
그럼 이제 제 해당 ID로 공개키 (Public Key)를 만들어 볼까요?
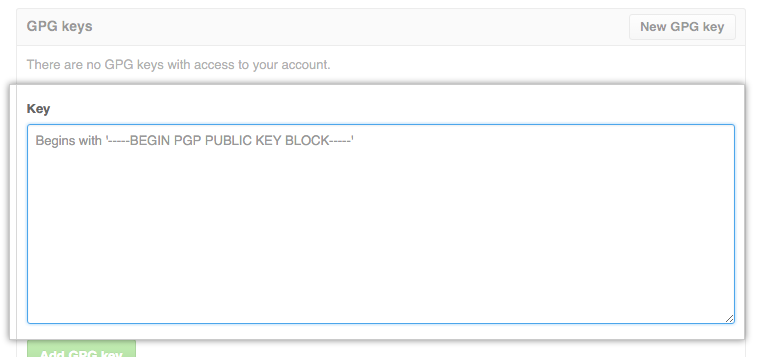
3. 공개키 생성
생성을 위해서는 아래와 같이 ID를 넣어주면됩니다.
1
2
3
4
5
6
7
$ gpg --armor --export 037ED189F6F42EF3
-----BEGIN PGP PUBLIC KEY BLOCK-----
XXXXXXXXXXXXXXXXXXXXXXXXXXXXXXXXXXXXXXXXXXXXXXXXXXXXX
XXXXXXXXXXXXXXXXXXXXXXXXXXXXXXXXXXXXXXXXXXXXXXXXXXXXX
...
...
-----END PGP PUBLIC KEY BLOCK-----
위 처럼 BEGIN부터 END 가 나오게 되는데요 이를 Github 개인 Setting 에 복사해주시면 끝이납니다.
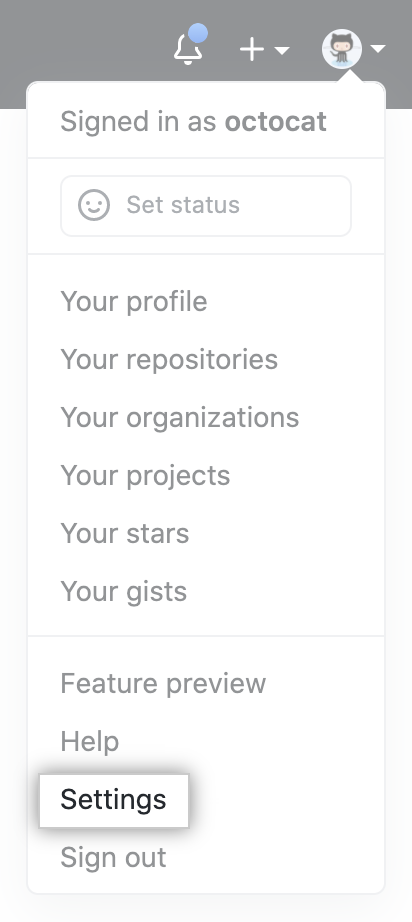
4. GPG 공개키 Github에 복사

5. 내 컴퓨터의 Git에게 내 GPG Key를 알려주기
우리는 아래와 같이 나의 GPG ID 를 확인 할 수 있었다.
1
2
3
4
5
6
7
8
9
10
$ gpg --list-secret-keys --keyid-format LONG
gpg: checking the trustdb
gpg: marginals needed: 3  completes needed: 1  trust model: pgp
gpg: depth: 0  valid:   1  signed:   0  trust: 0-, 0q, 0n, 0m, 0f, 1u
/home/jayleekr/.gnupg/pubring.kbx
---------------------------------
sec   rsa4096/037ED189F6F42EF3 2020-10-08 [SC]
      A95244C509A02D9F0790CFB0037ED189F6F42EF3
uid                 [ultimate] Jay Lee (lol) <jayleekr0125@gmail.com>
ssb   rsa4096/38DDEF7B4E6758A4 2020-10-08 [E]
이제 git 에게 이 key를 알려주도록하자.
1
$ git config --global user.signingkey 037ED189F6F42EF3
내 터미널(tty)에게도 알려주자!
1
2
$ test -r ~/.bash_profile && echo 'export GPG_TTY=$(tty)' >> ~/.bash_profile
$ echo 'export GPG_TTY=$(tty)' >> ~/.profile
6. commit 시 GPG Signature 와 함께 올리는 법
간단하다 -S 옵션을 추가하자!
1
$ git commit -S -m "#IssueNumber"
이제 GPG Key 를 생성할때 쳤던 암호를 입력하면 commit이 완료 됩니다.
Reference
- https://docs.github.com/en/free-pro-team@latest/github/authenticating-to-github/about-commit-signature-verification